Saturday, 18 December 2021

Cave Zones


Hi guys, today I wanted to share with you more activities we did during our cave unit study. We learned all about cave zones and creatures that live in caves. Here are some of the activities we did. 


We learned about the different zones in a cave and made this tear art showing the light transition in each part of the cave. 


Cave Zones painting in his notebook


We also learned about the different creatures that live in caves. The cave visitors, the cove lovers, and the cave dwellers. 


We also made cave zones in a cup similar to the layers of the ocean. We used a flashlight to see how much light can pass through each cup. 

You can find all these activities and printables in my tpt store. Click on the image below to get grab these activities. 


Thursday, 16 December 2021

Rock Candy


Hi guys, today I wanted to share with you how we made rock candy during our cave unit study. 

Ingredients

3 cups of sugar
1 cup of water
A pot
Jar or a cup with small opening
Clothes pins
Stick or skewer
Sugar


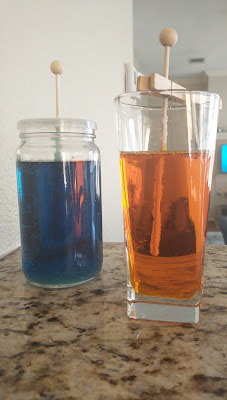
Adult supervision is required. Mix together sugar and water stir well and set it on the stove top. Keep mixing until the sugar has completely dissolved and the solution starts to bubble. You can add food coloring and flavor to your liquid at this point. Set aside for 10 minutes to cool. While your solution is cooling take your skewer and dip it in water. Roll it in some sugar and leave it to dry. This will be your seed crystals. Once the solution has cooled pour it into the jar. Suspend your stick in the solution using the clothes pin. It takes about 7 days to grow your rock candy.  


You can read all about the other activities we did during our cave unit here. 
After seven days you can remove your rock candy. Slowly chip away the sugar crystals around the sides. Remove the stick and suspend it over another empty glass cup or jar. Allow the excess sugar to drip away. Enjoy your candy.


Click on the image above to read all about it. 

Cave in a Cup Demonstration


Hi guys, today I wanted to share with you a fun simple demonstration about how caves are formed. 

Caves are typically formed by water. When it rains, the water oozes into cracks found in softer types of rock (limestone). As time goes by, the liquid slowly dissolves the nearby rock and wears it away. This causes the cracks to gradually widen in caverns. As the water level drops, caves and passages that we can explore are left.  

Material

1. Clear container or cup
2. Sugar cubes
3. playdough
4. dropper
5. toothpick

Instructions
Form a wall of sugar cubes on the side of your container. Roll out the playdough and cover the sugar cubes. Seal the sides by squishing the playdough on the edges. Make holes on the top of the playdough using your toothpick. Drop some water on the playdough and observe what happens. If the water is not getting in make your holes bigger. The holes represent the cracks in the rocks. 


This demonstration will show your child how a cave is formed. As the water seeps into the holes and reaches the sugar cubes, the sugar cubes start to dissolve. This is similar to what happens in a cave. As water gets into the cracks it slowly erodes the soft limestone rock. In a cave this takes a long time to happen. Once the water drains away you have an empty space and a cave has been formed. You can make a hole at the bottom of your cup and do it over a sink or bowl. Once the water drains away you will be left with your cave in a cup. 

Cave Unit Study


Hi guys, today I wanted to share with you all the activities we've been doing for our cave unit. This was a short mini unit about a week long. Here are some of the activities we did. 


We learned about different types of caves using three part cards. 
You can grab these cards from my TPT store


We also learned about how limestone reacts to acid using vinegar. 


We also made a cave in a cup after learning how caves are formed. You can read all about this science demonstration here. 


One of my sons favorite experiments was making rock candy. You can read all about how we made it here. 


Cave anatomy using this felt cave from Montessori By Mommy Cave Unit. 


Stalactite and Stalagmite. 
Related Posts Plugin for WordPress, Blogger...
01